How to Start Your First Vertical Farm
From Zero to Harvest — A Practical Guide for First-Time Growers
Step 1: Choose the Right Space
One of vertical farming’s biggest advantages is space efficiency, but that doesn’t mean any room will work. Consider these four factors:
1. Space Size
Recommended starting size: 10-20 m² (about the size of a small garage or storage room)
Why: Large enough for a small vertical rack, water system, and environmental controls, with room to move around
Avoid: Spaces that are too large (higher initial cost) or too small (difficult to work in)
2. Environmental Conditions
| Condition | Ideal Range | Minimum Requirement |
|---|---|---|
| Temperature | 20-25°C | 15-30°C (with heating/cooling) |
| Humidity | 50-70% | 30-80% (with dehumidifier/humidifier) |
| Ventilation | Natural airflow or exhaust fan | Cannot be completely sealed |
| Light | Light-tight (to control photoperiod) | Avoid direct sunlight |
3. Infrastructure Requirements
- Power: Stable electricity supply (expect 2000-5000W to start)
- Water: Access to a sink or water line (20-100L per day)
- Drainage: Floor drain or space for drip trays
- Floor load: Must support 200-300 kg/m² (when tanks are full)
4. Expandability
Choose a space that allows for future expansion. Example: Start with 15 m² in a larger room, leaving adjacent space for later.
Step 2: Equipment Checklist
Essential Equipment (Must Buy)
1. Vertical Grow Rack
- Recommended type: Multi-layer NFT or Deep Water Culture
- Number of layers: 4-6
- Tray size: Approximately 1.2m × 0.6m per layer
- Budget reference: $300-800 (for a small system)
2. LED Grow Lights
- Spectrum: Full spectrum (red+blue dominant, with some far-red and UV)
- PPFD: 200-400 µmol/m²/s (for leafy greens)
- Daily light duration: 14-18 hours
- Budget reference: $50-150 per layer
3. Environmental Control System
- Temperature/humidity sensor: ±0.5°C / ±3% accuracy
- Timer: For lights and water pump
- Budget reference: $30-80 (basic version)
4. Hydroponic Nutrient System
- Nutrient solution: 3-part A/B/C formula (starter kit)
- EC meter: Measures nutrient concentration
- pH meter: Measures acidity/alkalinity
- Budget reference: $20-50
Optional Equipment (Recommended but Not Required)
| Equipment | Purpose | Budget |
|---|---|---|
| Small exhaust fan | Air circulation | $5-15 |
| Humidifier/Dehumidifier | Humidity control | $20-50 |
| Water quality tester | Check source water | $5-10 |
| Security camera | Remote monitoring | $10-30 |
Step 3: First Planting Process — Day by Day
Day 1: System Setup
- Assemble the grow rack according to instructions — ensure each level is level
- Install LED lights — mount 30-40cm above each grow tray
- Connect the water circulation system — test pump and pipes for leaks
- Install environmental sensors — place in the center of the grow rack
Day 2: Prepare Nutrient Solution
- Test your water source — measure EC of tap water or RO water
- Mix the nutrient solution — Add A, B, and C components sequentially
- Target EC: 1.2-1.8 mS/cm (for leafy greens)
- Target pH: 5.5-6.5
- Run circulation test — let the system run for 1-2 hours to confirm stability
Day 3: Sowing
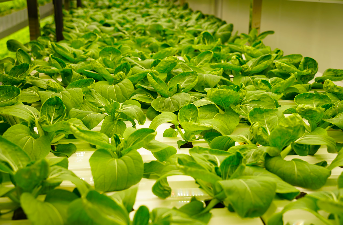
- Choose your first crop — recommended for beginners: Lettuce, Pak choi, or Basil
- Growing medium: Rockwool cubes or sponge plugs
- Sowing depth: Approximately 2-3 times the seed diameter
- Place in grow rack: Insert the cubes into the grow channels
Day 4-20: Daily Management
| Task | Frequency | Notes |
|---|---|---|
| Check water level | Daily | Do not let it drop below minimum line |
| Measure EC/pH | Daily | Add water if EC is too high; add nutrients if too low |
| Check lights | Daily | Ensure timer is working correctly |
| Inspect for pests/disease | Every 2-3 days | Early detection is easy to fix |
| Change nutrient solution | Every 7-10 days | Completely replace and clean reservoir |
| Adjust plant positions | As needed | Move taller plants to outer edges |
Day 15-25: Harvest
- Check for maturity: Lettuce (10-15cm tall, 5-8 leaves), Pak choi (12-18cm tall)
- Harvest methods: Whole plant harvest (cut at base) or Cut-and-come-again (harvest outer leaves only)
- Post-harvest handling: Rinse roots, pat dry, store in refrigerator (4°C / 40°F)
Common Problems and Solutions
| Problem | Possible Cause | Solution |
|---|---|---|
| Seeds won’t germinate | Temperature too low or old seeds | Check temperature (20-25°C), use fresh seeds |
| Yellow leaves | Nitrogen deficiency or low light | Increase nutrient |